Blythe Doll Extravaganza

The other day I went to show someone my Blythe Doll cookies on my website, and imagine my dismay!  They weren’t on there!  I was so crazy busy that some blog posts just didn’t get written.  Remember when I showed you my Arty Blythe from my visit to Kansas to be a guest prof. at McGoo U?  Well, these are the cookies I made with the cookies I had for my doll eye tutorial there.

Blythe Sisters | The Cookie Architect
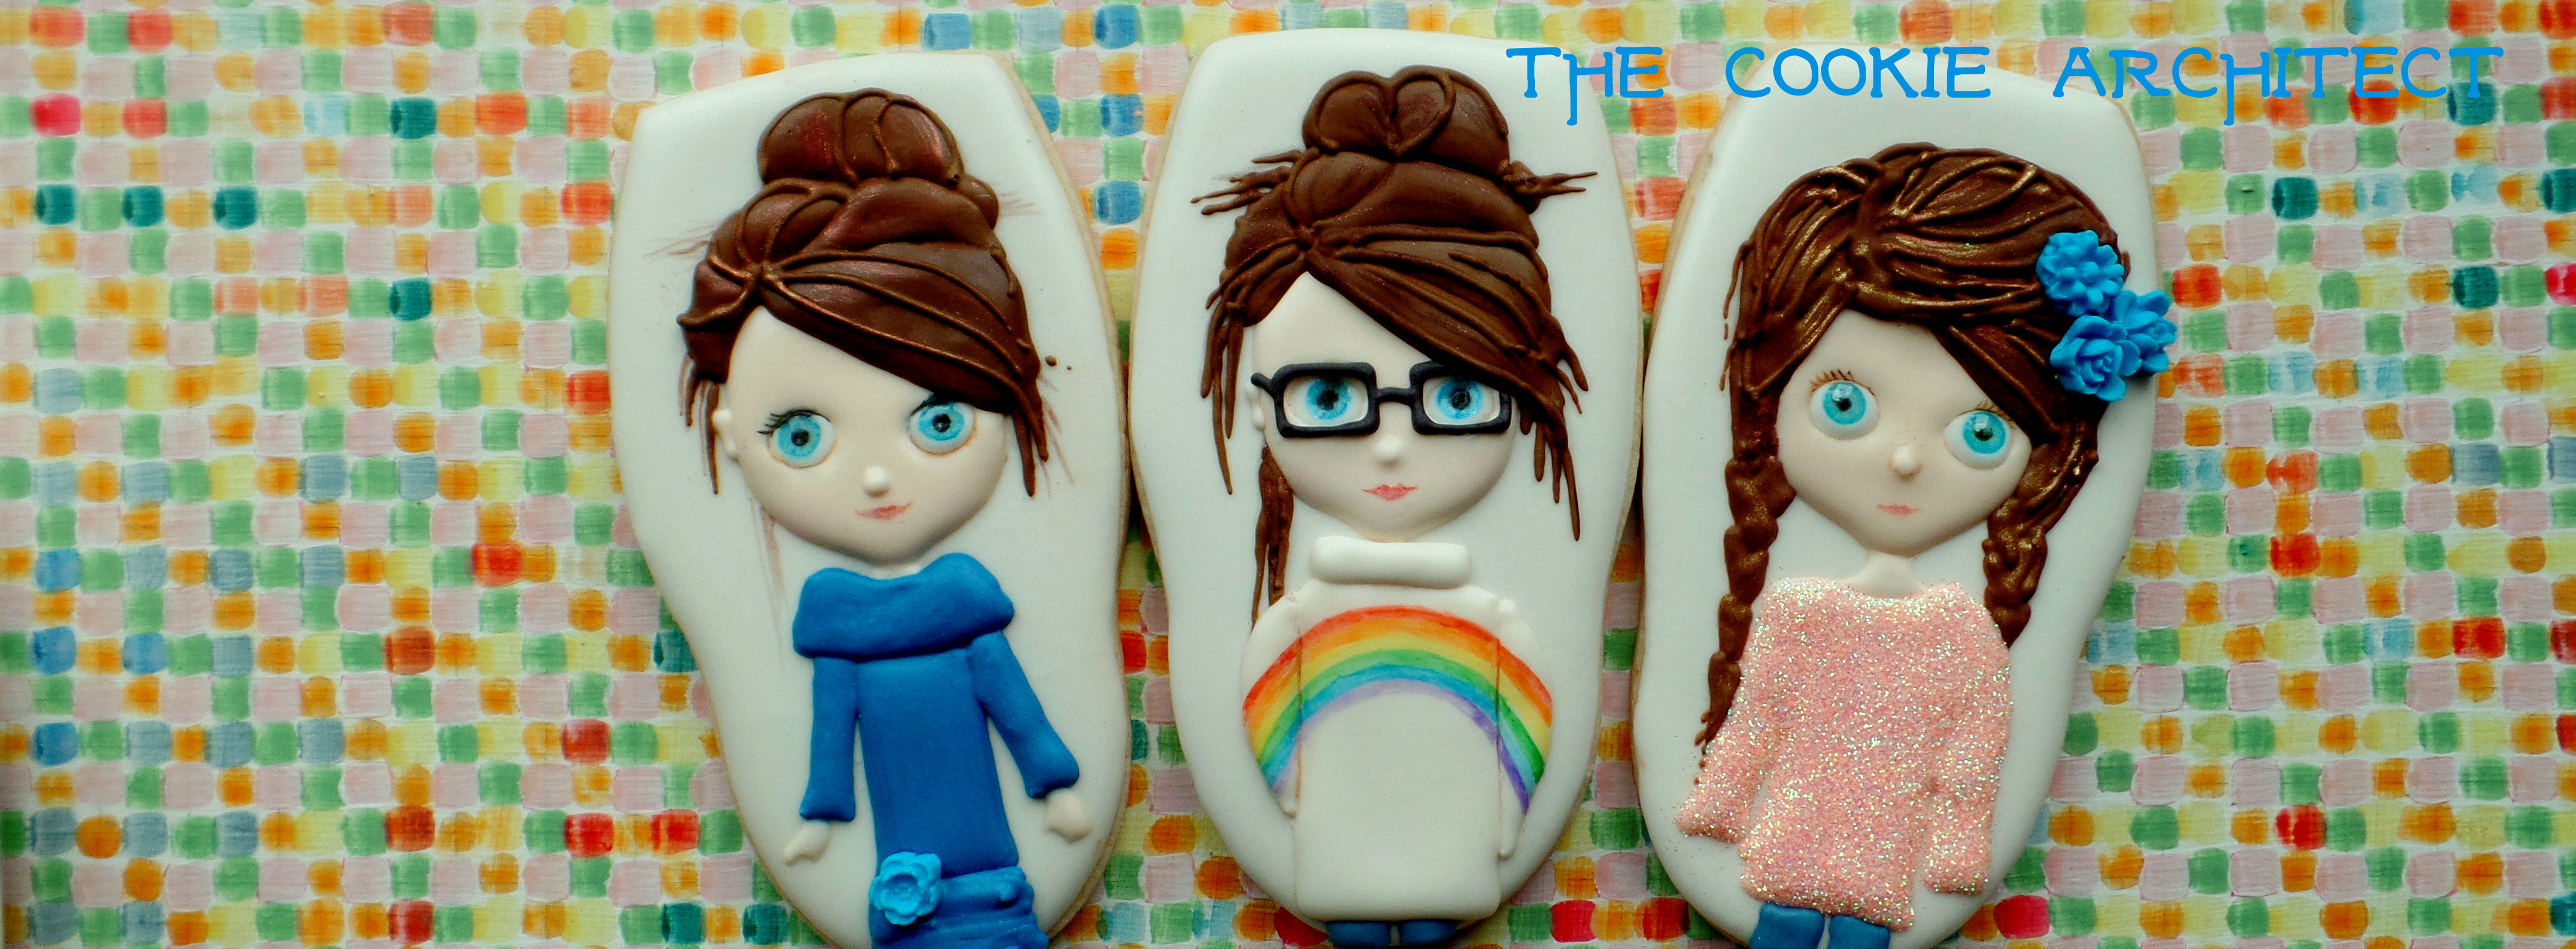
The girl on the left is the girl I made for my doll eye tutorial available on McGoo U.  The eyes are made with fondant, with an indent for the iris painted and then filled with corn syrup.  Everything else is royal icing (and disco dust!).  The other girls here are her sisters, made from the other stages of cookies I made for that tutorial to show the step by step.

Every Which Way Blythe | The Cookie Architect

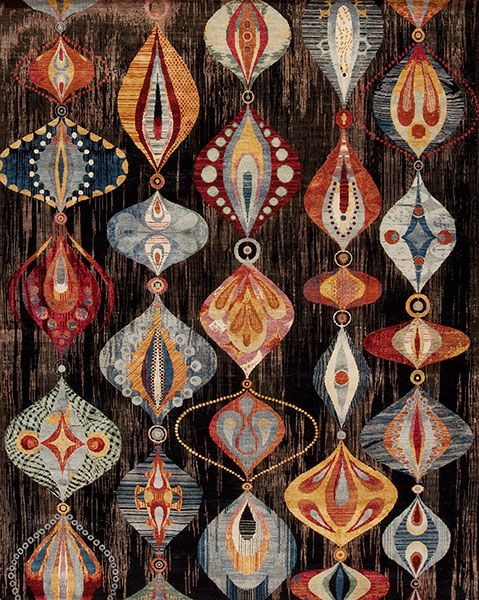
I know this is a random collection of dolls.  My initial inspiration was a big picture of someone’s Blythe collection all arranged in a circle.  I knew I had to create a cookie collection, and I wanted to experiment with different looks. In the end I was inspired to try and make a crazy doll video- to create a kaleidoscope effect.

And here are some of the individual dolls!

Rainbow Blythe | The Cookie Architect

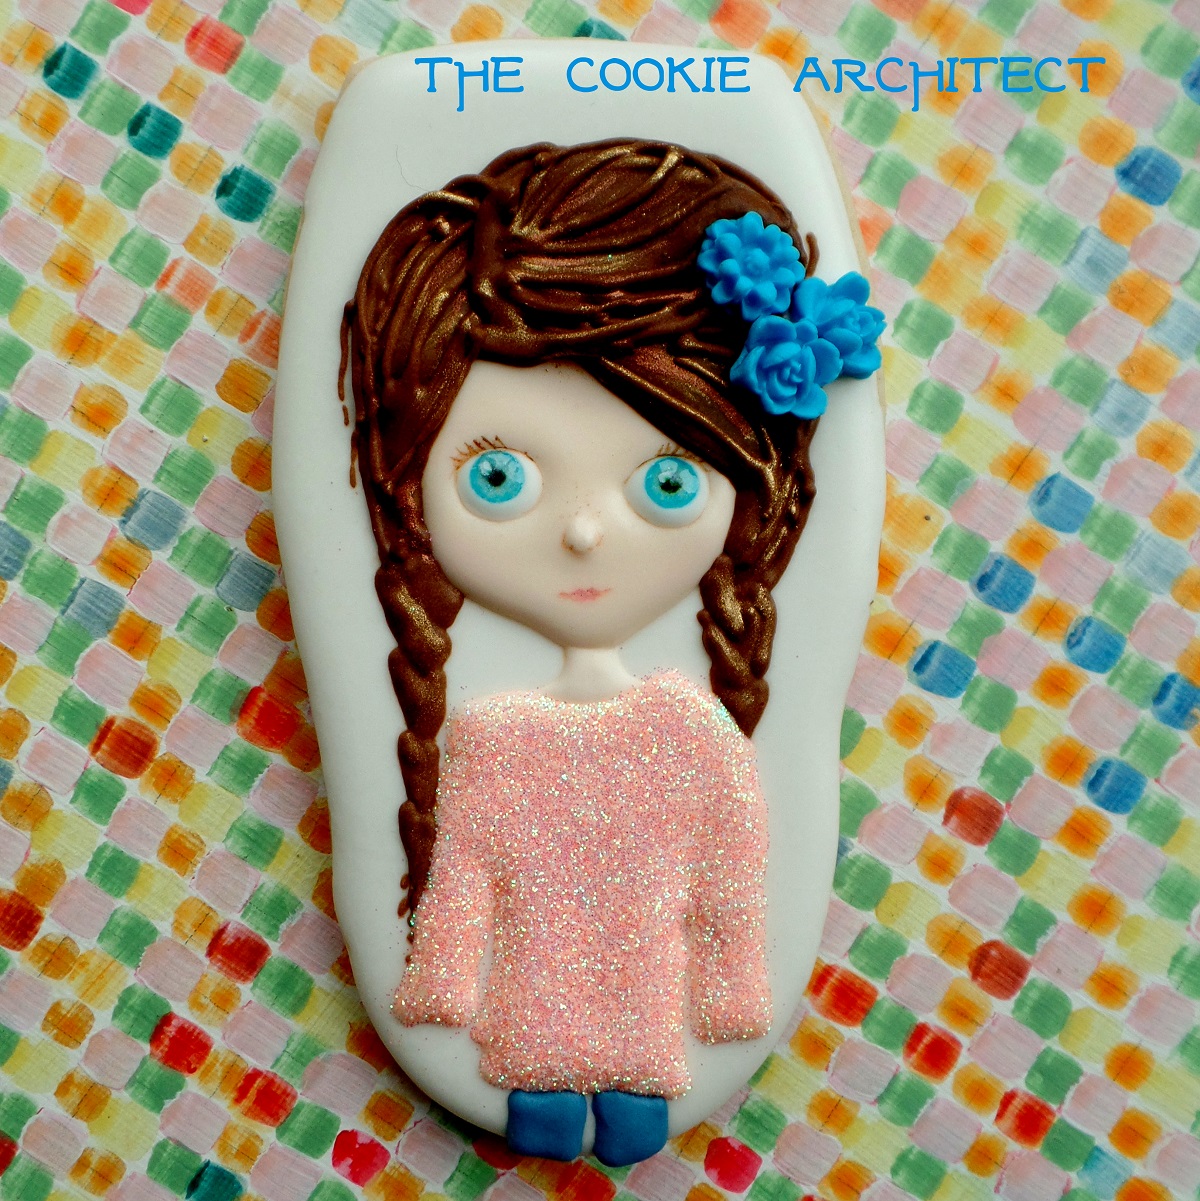
Everyone had this shirt when they were a kid, I think!

Big Hair Big Eyes | The Cookie Architect

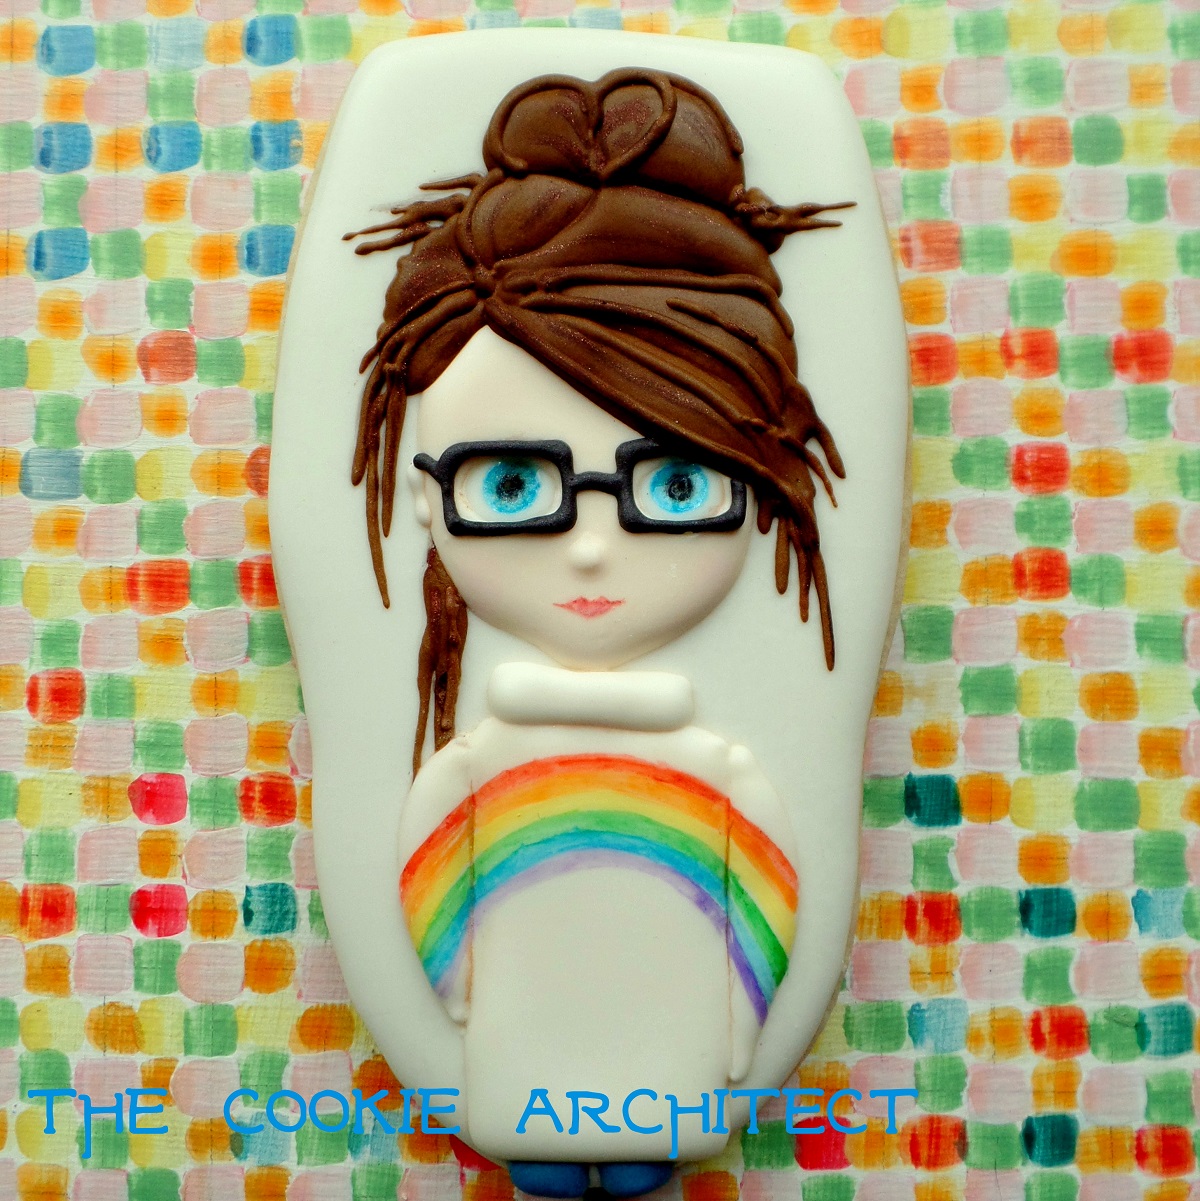
This one wasn’t my fave.  But I like her sweater.

Sulky | The Cookie Architect

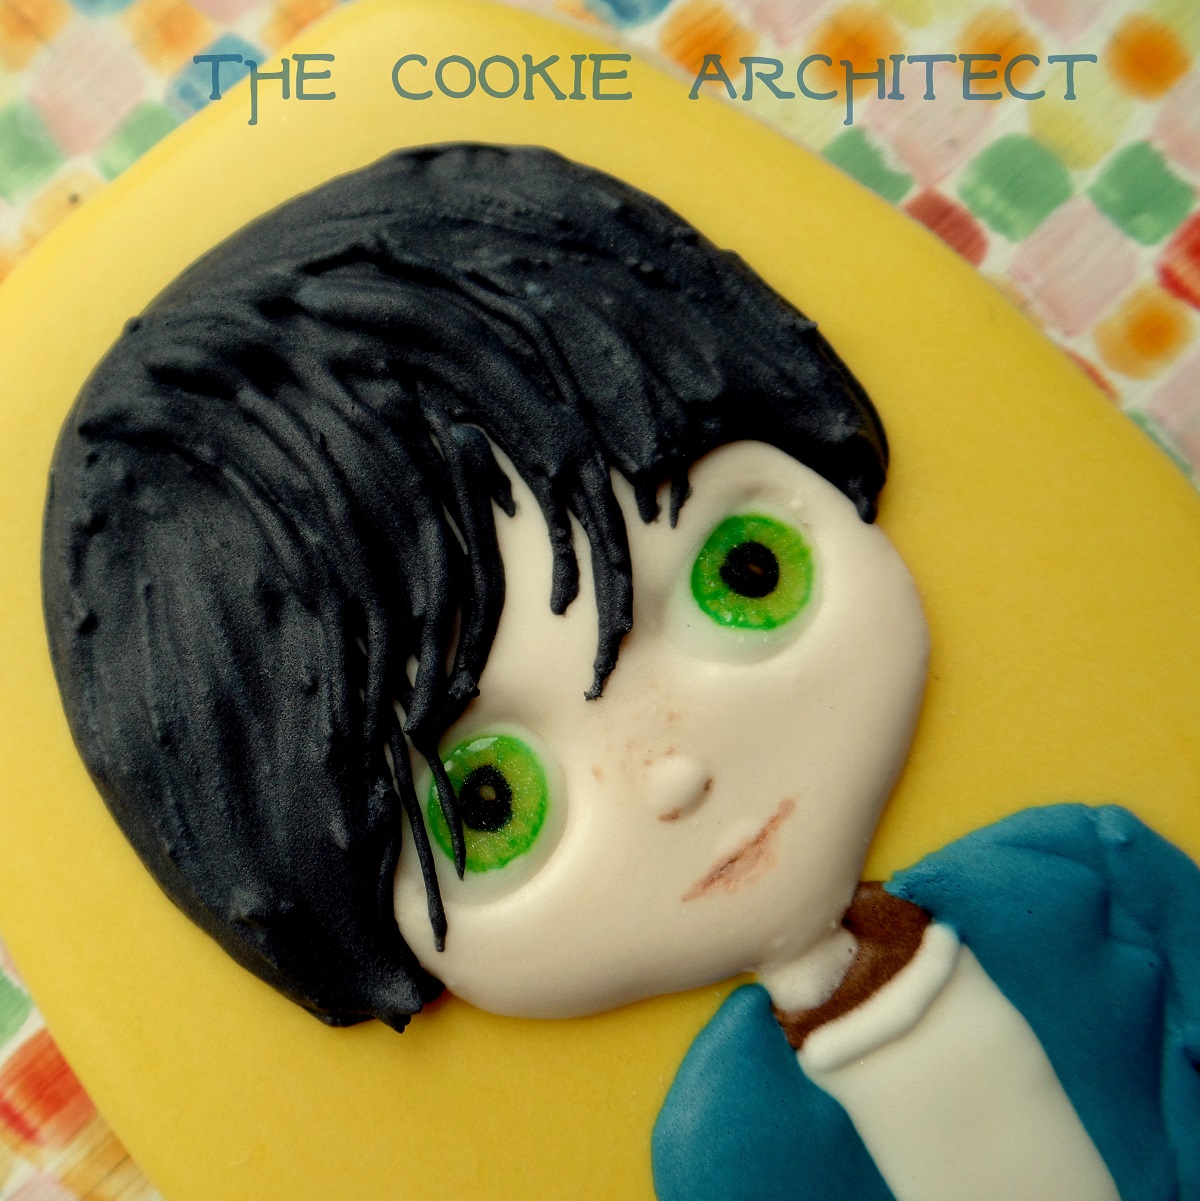
I love how moody this one is! Such a teen!

Shadow Lustre | The Cookie Architect

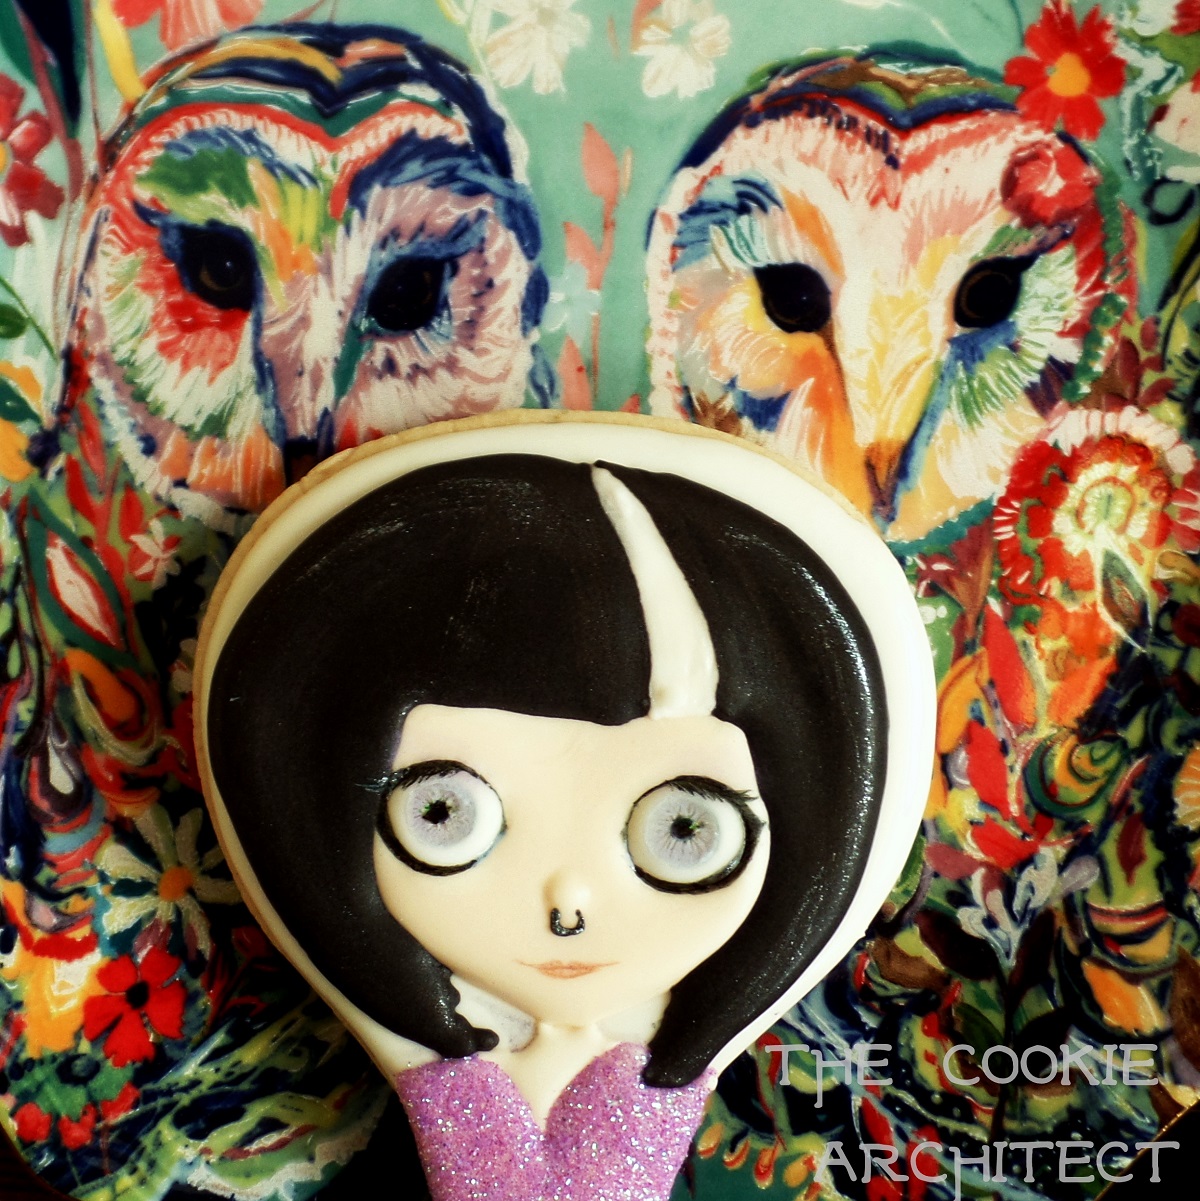
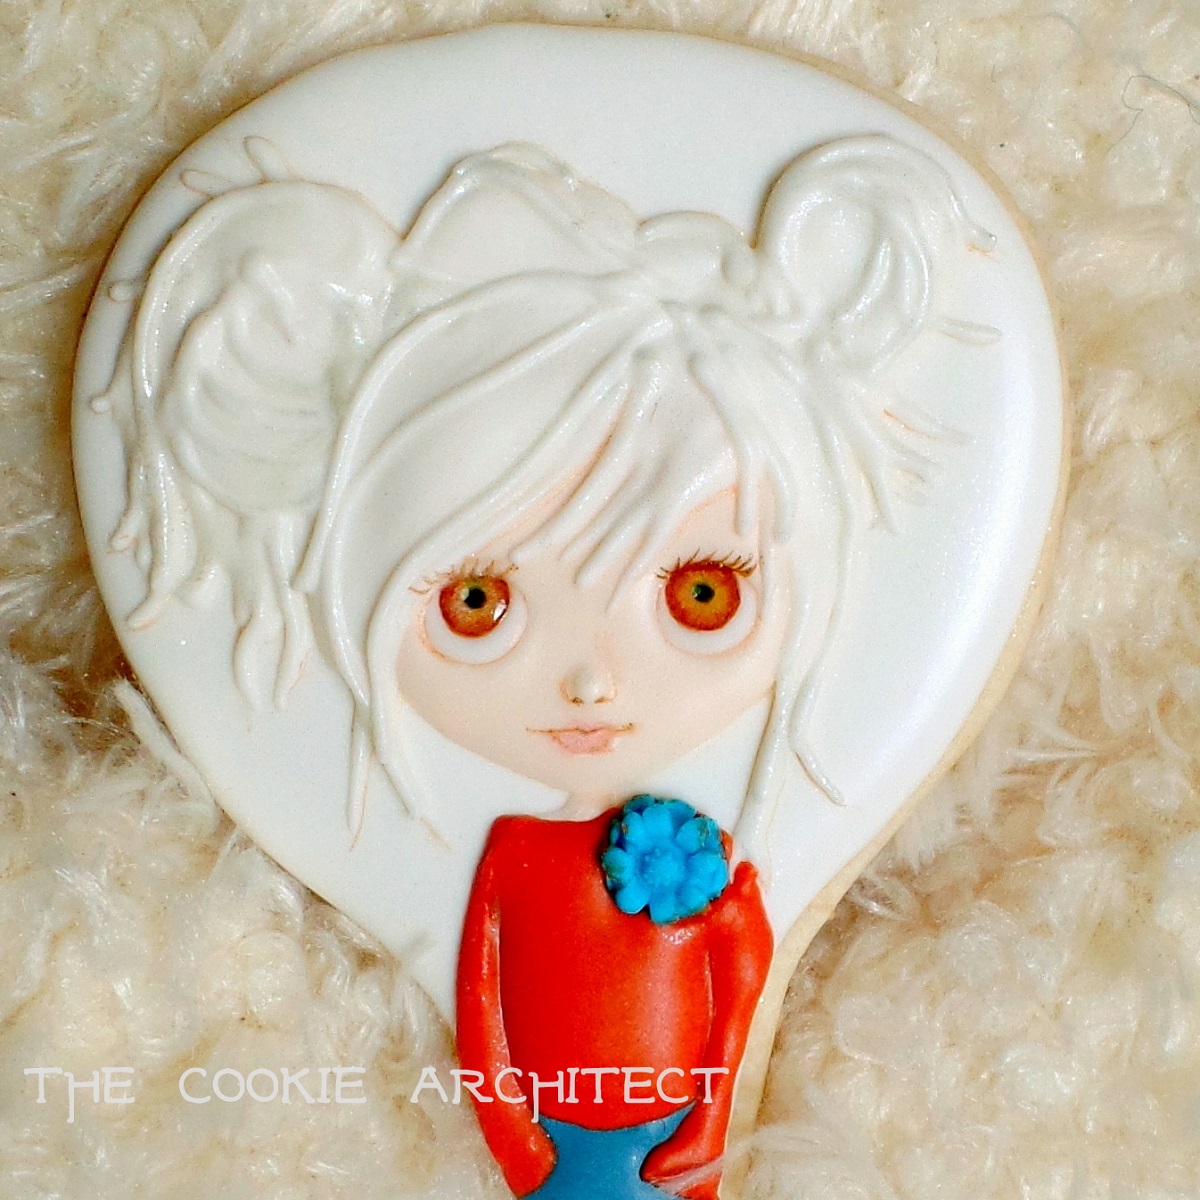
Here she is all grown up, haha! I call her….Shadow Lustre.

Blyguy | The Cookie Architect

Everyone’s boyfriend. Or no ones, if you catch my drift.

Bunny Blythe | The Cookie Architect

This little lady looks a little worried about her competition.

Blythe | The Cookie Architect

My personal fave! Her eyes are a little more brown in real life.  Here she looks a little dangerous.  Either way, I love her!

For the Birds

Did I mention that I just finished up a top secret project?  Shhhh.. It’s true!

And I’m not here to tell you about it or show it to you.  Totally top secret.  Instead, I will share this random collection of bird-themed cookies I just made to celebrate the seemingly miraculous advent of Spring. Yes, spring in the North Country happens in May.  And by happens, I mean, the temperature is consistently above freezing and it’s even been this thing I’ve heard of called…warm?  And sunny, and dry.  A miracle and I’ll take it.

I made a birdhouse, and a couple of birds. Both birds kind of go with the birdhouse, but not with each other unfortunately.  So, you’ll see we have a couple of different birdy vibes happening, some more realistic than others.

But first, the birdhouse.  I love this and it turned out much better than I expected.

Birdhouse in a Tree | The Cookie Architect

The main thing you are wondering about, based on previous comments alone, is the finish. The carefully hand painted  (or was it etched?!?) crackle paint finish.

Hahahahahahahahahaha!  Guys! It is so much better than that.  Why? Because it was a stamp.  Like, a rubber stamp.  Seriously, the fastest, easiest, coolest cookie finish.  And it took me three minutes.  I LOVE IT!

I was inspired by a gorgeous Easter set by Baked on Briar that I loved, so I went looking for a crackle stamp, and found this one instead.  Even better for what I had planned! And while I wasn’t ready to break the bank with stamps….let’s just say that when you go looking for a stamp like this, you will find more options than you ever dreamed of.    Here is the one I used:

SAMSUNG CAMERA PICTURES


And just in case I haven’t dispelled enough of the cookie magic, let me just also say that the scrollwork perch is a fondant mold.  I didn’t pipe that.  Though now I want to try.

I made one bird cookie where I went for realistic, with the painting help from a fabulous tutorial from Honeycat Cookies (like this, but you know, ten times better!!) I came up with this guy:

Bird on a Branch | The Cookie Architect


And last but not least, I have a kind of epic silver dragee collection going now, largely thanks to How Sweet is That, so I was also inspired to make this super realistic, super safe to eat bird!

Shiny Bird | The Cookie Architect

By the time I finished all these cookies, they were minimally edible, so I let my brother eat them.  He assured me that it was fine that I stuck them in this tree for photos.  In case you were worried.

So there you go! Spring is here!  Blessing on all!!!

Chicken and Egg Pysanky

When I was first starting out, one of the first things I did was this set of Pysanky eggs. I did it as a decorating party, and spent two weeks planning my designs, and about six hours mixing icing and flooding cookies for me and my friends. And about an hour and a half to pipe them!  They are still some of my all time favorites!

IMG_5866 (2)

This year, I wanted to do something different with Pysanky style cookies for Easter. Randomly, I have a whole collection of chicken and egg cutters.  So I put Pysanky chickens on all the eggs, and Pysanky egg patterns on all the chickens.  Because that is the sort of thing that I do….  To do all of these, I first hand painted the color, then piped over them.  They are all pretty small.  The “big” eggs are about 3″ tall.  They were super time consuming, so some were consumed before I had to paint them!  I hope you enjoy them!

Pysanky Chicken and Eggs | The Cookie Architect  Pysanky Chickens Angle | The Cookie Architect Hens and Egg | The Cookie Architect Eggs and Chickens | The Cookie ArchitectPale Egg | The Cookie Architect  Black Chicken | The Cookie ArchitectRooster | The Cookie Architect

Blythe all the things!!!!

I just got back from the most fun little cookie trip! I went out to the magical Kansas film studio where Arty McGoo was awesome enough to have me on as a future McGoo U guest!

Do you guys know all about McGoo U?  It’s a fabulous online video series that is professionally put together with lots of fun extras.  And the star of the show is the most amazing cookie artist- Arty McGoo!  I mean, I was putting together a tutorial for my mini expert lab, and half the techniques I used I learned from her.  Crazy!!  So you all need to go sign up so you can see her amazingness.  And then next month you can see my tutorial and the skit.  Oh, the skit.  Wait ’til you see the skit.

Just to illustrate how silly and fun it all will get- I made a little present for Arty….I “Blythed” her latest Instagram selfie.

Arty on IG

This was not my idea, mind you!  My amazing friend (and uber-gracious hostess- I stayed with her and it was divine!!!!) Laura of Cadillac Cookie thought it would be funny.  And you know what, I think it is funny too.  I love Blythe dolls, and I love Arty!  Put them together, and you get Little Miss Blarty!

SAMSUNG CAMERA PICTURES

If you are wondering how I did the eyes on this cookie, you are not alone. My expert lab tutorial will go through all the steps, so be sure to subscribe for April!

And if you are wondering why Blarty has a five-head, and no eyebrows, and her head is all roundy, that’s the “Blything”.  Yeah, Blythe dolls don’t have eyebrows for some reason….But they have huge ol’ heads!

And now I am back home and diving in to cookie Blythe-land now!! Looking forward to showing you my next project with all the new “dolls”! Until then, cheers!

[To leave comment, click on blog post and scroll down.]

Valentine’s Day Part 3: Sacred Hearts

These last few red and white cookie sets were all done very spontaneously.  Typically, I draw inspiration from a number of places, and do drawings, and fuss and ponder.  But I had a mountain of icing, and “needed” to try some peanut butter cookies.  So that’s why I’m coming up with these quick, one inspiration photo cookie sets.  This is me “winging it!”  For me planning the heck out of something, see just about every other set of cookies I’ve ever made.

For my last Valentine’s Day set, I’m veering into Mardi Gras territory in terms of the level of luster and sparkly edible paint!  And since tomorrow is Fat Tuesday, the timing is perfect.  My inspiration for these cookies was Mexican Folk Art – Sacred Hearts.

Mexican Folk Art: Sacred Hearts

I was just playing with the motifs and the feel. These were fun to cut out- I used a variety of cutters, and imprinted the hearts with a cutter for easy flooding later.  I’ve included a process pic here.

Sacred Hearts Process | The Cookie Architect

The pristine white piping always makes me wonder if the later painting “ruined them,” but it’s just a different vibe.

Sacred Hearts | The Cookie Architect

Sacred Hearts 1 | The Cookie Architect  Sacred Hearts 2 | The Cookie Architect


I had one cookie at the end where I reversed the red and white.  I ended up leaving that unpainted (except for the obligatory luster dust haha!) because it just didn’t fit in the set, and looked great to me just the way it was!

Valentine's Day Heart | The Cookie Architect

To see all my Valentine’s Day Cookies, check out my cookie gallery!

Valentine’s Day Part Two: Flowers, Hearts and Cookies, Check, check and check!

Well, I know that normal people don’t blog twice in the same day, but I’ve got a backlog of cookies, and a new blog, and I meant for this to be a draft, but I haven’t figured out how NOT to publish things and just save the draft, so here is my newbie blogger second post of the day.

For this next set of Valentine’s Day cookies- it all started when my mom asked me to make cookies for her Physics class (and the teacher), and that morphed in to me experimenting with a new royal icing recipe in her class, and everyone decorating cookies. Best.day.ever. for those kids, let me tell you!  There was lots of official sounding discussion of viscosity, by which I mean consistency….  We had piping viscosity and 20 second viscosity, which I even timed with my phone so that it would seem more “sciencey.”  The upshot of this experiment is that I had a mountain of red and white icing when we were done.  And since it was just a few days before Valentine’s Day, I figured I would have to make some more cookies.

For the cookies, I tried out Sweetopia’s Peanut Butter cookie recipe, which came highly recommended, and is quite tasty.

For the inspiration, I went looking in (you guessed it) one of my secret Pinterest boards, and found a few red and white things to inspire my new cookie sets. For this particular set, I started with this picture:

ca666d4161db8ac2547adc29653be709

Magic Petals II By Bella

Now, I didn’t want to just copy this, but do my own cookie spin.  But I loved the looks of this style of flower and definitely wanted to do something along these lines. One thing that I did to make it my own was pair up petals in the flowers so that they were kind of funky heart shapes.  And I also paired up some of the flowers so that they were on heart shaped cookies.  When the time came, I decided to to do some flowers in the reverse color scheme.  All told, I didn’t stray too far from the original inspiration art, which I love!

When I went to cut out the shapes, it seemed like a good idea to notch between the petals, I realized later that I had just seen my good friend Dany’s Cakes do something similar on some flowers, and it must have snuck in to my brain.  This sort of thing happens all the time in creative endeavors: you see things and they crop back up in unexpected ways, or two people do the same thing at the same time, but that is a whole other blog post in the making!

I piped these the way that I did because the icing that I had made was an experimental tweak, and I wanted to see how it held up to the risk of craters.  Filling in all those petals after piping the surrounding color would have been a recipe for crater disaster if the icing wasn’t up for it, but it was great!   I also used my dehydrator, which I’ve found helps minimize craters.  I did get a few shallow dents, but I decided to think of them as texture!  So, without further ado, here are my red and white Valentine’s Day Heart Flower Cookies:

SAMSUNG CAMERA PICTURES

SAMSUNG CAMERA PICTURES

For all of my Valentine’s Day cookies from this year- check out my cookie gallery!

Valentine’s Day Cookies Part One: You Make Me Quiver

Well, I never really got to make Christmas cookies, and that meant I had a lot of ideas and holiday cookies pent up inside apparently. Because I have made three different sets of Valentine’s Day Cookies (and counting) and it’s V-day today!

For this first set, I had some leftover icing in interesting colors from my Cookie Tile Explosion set, and I wanted to do something for Valentine’s Day.  I solicited opinions on Facebook, and Beth from Love Bug Cakes and Cookies suggested a pin that I had recently pinned to my Christmas Ideas board on Pinterest.   What a great idea!  So good that I told her SHE should do that one, because… that pin had already reminded me of this picture:

8007d02472de946cc26c39bd595cb328

This great art by Rex Ray had been my unused inspiration for Lilaloa’s non-traditional color challenge.  But right next to it was THIS PICTURE.

6f9f14eee39bd8ba6c2c2e3cfe4800fa

And this particular image, also by Rex Ray, is what ended up inspiring the motifs of this set.  And because my inspiration is always a hodge podge of things that I am sifting through- I’m not a big “cutter” girl, and I didn’t have a lot of hearts to choose from, mostly I just had these two old tin hearts with arrows.  So I used those, and I pulled it all together with a cute Valentine quote that I had seen that was arrow related, “You make my heart quiver.”  And there you have it- campy, arty earthy valentines, with a cheeky message.

Campy Arrow Heart Cookies

All

SAMSUNG CAMERA PICTURES

You can check out all of my latest Valentine’s day cookies in my gallery!