
Hello All,
Yes, I know, this is a decorated cookie website. And I know that I owe you cookies!
BUT, in the meantime, I’ve been down the rabbit hole in search of the “perfect” face mask. I put perfect in quotes because what works for me may need tweaking for you, because most every face is different. But I’ve been taking daily walks, and so with every mask iteration, I test it out, and the pattern I’ve come up with is the result.
My mom taught me to sew- and she sewed all her own clothes, our stuffed animals, Halloween costumes, etc. I used to quilt and do more fabric art before I got cookie OBSESSED, which explains all the sewing stuff I had at hand. And since my mom now does more fancy quilting, I get to sew on her old machine at her old sewing table, which takes me all the way back!


I started my mask quest with a great mask tutorial from The Crafty Quilter, pictured here. Her Versatile Face Mask pattern is the one that my husband still uses (The tie version). And my youngest as well (A version I made with elastic bands and buttons, don’t ask! ). But I felt a little like a masked villain. And the fit was a little too close for my liking, so that with the nose wire on snugly, the fabric suctions to my nostrils when I breath in hard.

Not that this mask doesn’t still have it’s place in my repertoire, I like the hairband elastics, and it’s great for short term use like a trip into a store. Easy on and off and comfortable in low exertion. In the photo below I show a few tweaks I made to the pattern. I left the sides long, instead of folding them over to make a channel for the loop elastic. I also folded up the bottom edge of the sides up at an angle, so that the sides ended up closer to my ear height. Then when I did the hairband ties, they weren’t having to stretch long distances.

For all of this style of mask, with removable wire- I used this thicker copper wire for the nose and turned over the ends. Best to bend a stiff wire into nearly the right shape with your fingers before fitting it to your nose! But my family liked the stiffer wire because it prevented the air you were breathing from just being straight into your eyes. And it helps hold the mask in place. Also, note a very brief stint in jewelry making, hence the wire and fancy pliers and things. I feel like I’ve been hoarding preparing for this craft moment all my life. (Note: I’ve also used those aluminum flat nose wires in this pattern with success.)

More of that same mask with my customizations. I finished them nicer so they could be reversible. And a teeny bandit mask for my new niece, which she should NOT wear, because she is under two. Well, maybe one quick pic, then take it off?


See, she’s fine. I mean, just look at this sweet face!


Brief aside into a super easy mask for the ladies. Take a coffee filter. Fold the long edge down over a nose wire (paper clip unwound, pipe cleaner, fancy copper wire if you are ridiculous like me ). Stick into a pretty scarf folded over to the right size (this was four ply). Baste in place below wire in folded filter with a long stitch or handsewn. Tie and go. Nose wire holds in place. You can remove basting after to remove filter and wire to wash, and also to revert back to a scarf. Same thing can be done with a bandana for a more masculine look.


In search of an improved look and breathability, I next tried this pleated mask pattern from Create To Donate (Shown above). I liked how the ties were vertical, because I knew that being able to adjust how high you tied them was one of the ways to help hold up the mask. The immediate con to this design was that when I put it on, it cut into my undereye and felt uncomfortable. I knew that it needed some tweaks!
That’s where my pattern idea comes in! I decided to combine the shaping around the nose from the first pattern with the roominess and looks of the pleated pattern. It is also a little easier to sew than the first pattern, especially if you already have bias tape. I made my own for these because my bias tape collection only lasted a short while in my mask extravaganza.

I drew up the pattern in my drafting program because I am an architect in addition to being a CRAFT NERD. I even made it in three sizes. Because first I made adult and child, then decided that the child was for small children, and the middle schoolers needed something in the middle.
UPDATE: There is now a Mask Pattern 2.0!! After wearing my new mask for a week I came up with two relatively minor tweaks (don’t despair if you already made a mask, that one is still good). This one drops away from the eye area a little more, and rearranges the pleats a little, to give a little more room right under the nose.

AND because I made ANOTHER CHANGE here is a version 3.0. A little simpler than 2.0, and you can use those manufactured aluminum nose bands with it. Some people tell me the 2.0 is great if you wear glasses, because you can rest them on top of the nose part, but I like the look of this version if you don’t wear glasses.

Grab the Version 3.0 in all three sized here!

Start by cutting out two pieces of the pattern. I used a plain white inside and a print for outside. Sew them together with a 1/4″ seam allowance along the top and bottom edges, as indicated on the pattern.

I found it easier to turn it right side out when I pressed the seam allowance to the side before turning it. The nose part was a little tricky so I just kind of poked my iron at it.

Topstitch the top 1/4″ away from top edge. Top. Toppity top top. (Sorry, that was a lot of tops and I couldn’t stop. )

Topstitch the bottom straight edge close to the edge. If there is a technical sewing term for that I’ve forgotten it! (PS Mom read this and tells me it’s edgestitching.)


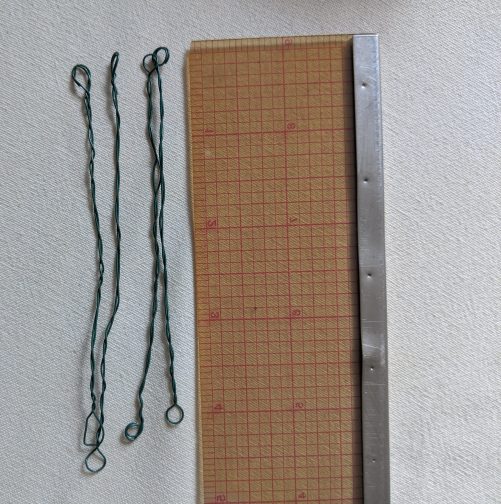
For the nose wire, in this pattern I used twisted floral wire. Because I have lots. And jewelry making pliers. Honestly, if I hadn’t let my children play with/destroy them all, I would have used pipe cleaners, or maybe two pipe cleaners? Anyway, paperclip unfurled, some other wire, etc. will also work. I took a nine or ten inch long piece, folded it in half with pliers then twisted the two halves together, and put a loop on the other end with pliers. Because I didn’t want it sliding around much and I didn’t want pointy ends.
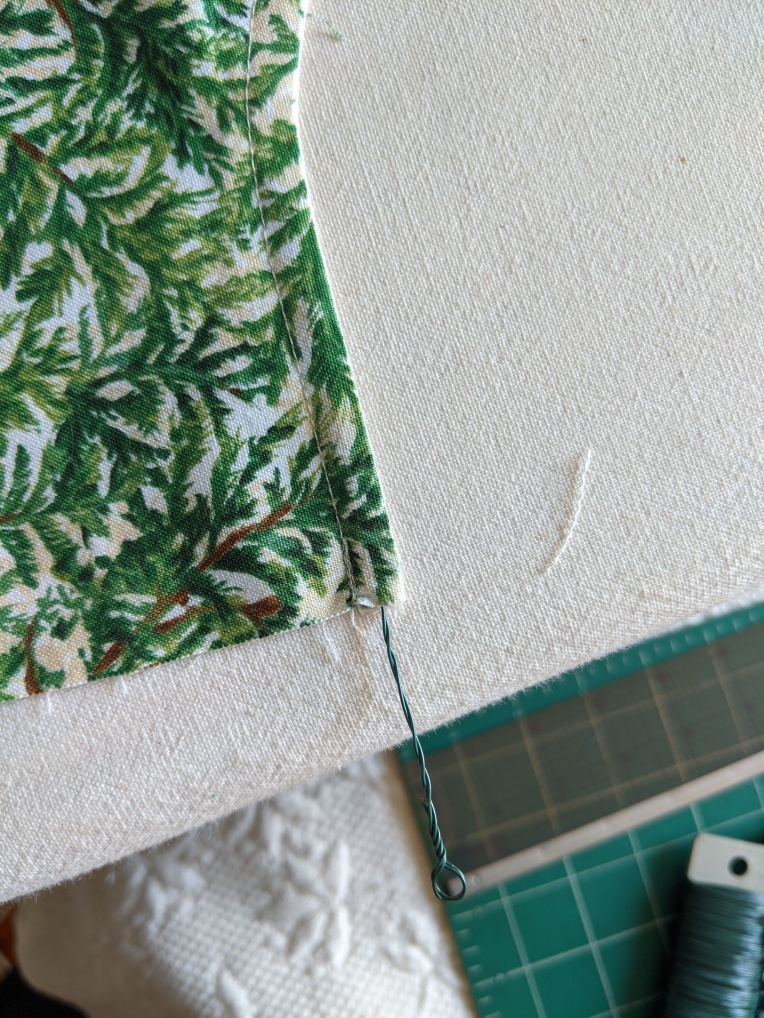
Slide the wire in the top until it is centered on the nose, shaping it to the curve.


Next use your iron to fold the pleats. I also made a guide on the pattern. I started at the top, ironed over the top, then folded it back, then did the other pleat kinda freehand.


This is the tween size. The adult size is more like 3.5″ tall on the side and 4″ overall when done (Narrower on version 2.0). I used some tiny clothespins I had to hold the pleats in place because I’m not up on the times and didn’t have little Clover clips to use instead of pins (Avoiding poking holes in the mask). I blame cookies for distracting me from the latest in sewing trends. Pretty clear that Clover clips are the tipless piping bags of sewing.

You can just baste or topstitch the pleats in place, but I like this finishing stitch because my bias tape was skinny and it made it easier to wrap it around the mask’s edge.


I made my own bias tape with the bias tape maker I had. Which was a very small one. So I kind of ironed it wider and made it work. Full disclosure, it’s not bias tape. It’s on the grain tape. Because it doesn’t need stretch, and I didn’t need to cut a bunch of strips on the diagonal. I did have some half fold bias tape I had made a million years ago to finish a quilt, so I free ironed that into double fold tape. Ugh, it’s all just exhausting. Buy bias tape like a normal person, if you can, 3/8″ wide. Mine was more like 1/4″ and borderline too skinny. Note that bias tape is hard to find right now. As is thread. Add them to the list.
(Later I found the perfect bias tape in a million colors, really fast shipping, at Laceking.)

The bias tape ties should be 32-36 inches long, depending on noggin size and age. You need two per mask. On this youth one, I’ve got 15″ on the top free, and a little less on the bottom. 
Similar to the pattern I was adapting from, I clipped the ties in place on the pleated sides of the mask, then starting at one end of the tie, I used a zig zag stitch to hold the ties together, and also to sew them to the mask when I got to that part. I also went back and topstitched with good returns on the ends to securely hold the ties to the mask. I’m planning on using and washing a bunch so I want them to last a bit.
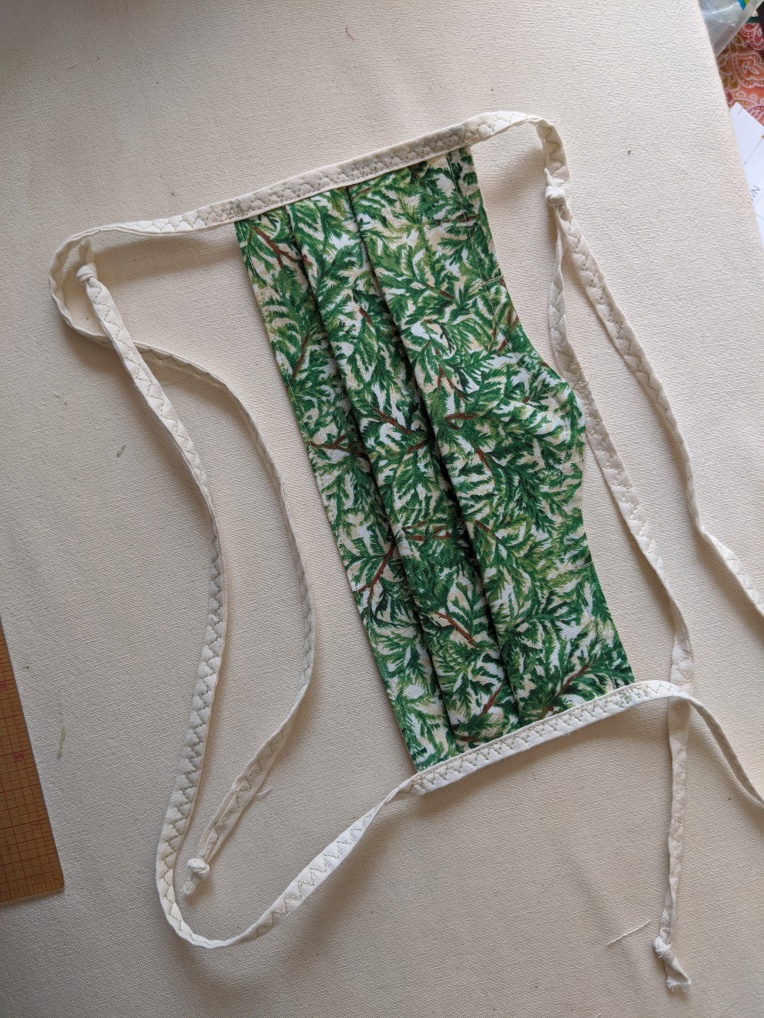
Tie knots in the ends of the ties and all that remains is shaping the wire a bit in place and tying it on!


My youth model now wants one just like it for himself! This one is for a friend of his (after I wash it!).


Hope you are all keeping safe and I send you all virtual hugs! Keep in touch, and stay sane, and beautifully cover your beautiful faces while out in public. I miss them already!


Nice! This is something we can to to help our communities prepare for a time when we can be out more. Finished my first 100 this week and starting on my next batch tomorrow.
#IProtectYouYouProtectMe
LikeLike
Brilliant! So good hearing from you. Thank you for showing us your amazing face mask. Keep safe!❤️❤️
LikeLiked by 1 person
I am so ready for a new pattern. I’ll give this a try.👍🤗
Bette Wu….
LikeLiked by 1 person
Im am going to try this! This will be my 4th different type of mask I have Sewn… Hopefully this one is the best 🙂
Thanks,
– Jennifer Wallace – JenniBakes4U
LikeLiked by 1 person
I hope you like it!❤️
LikeLike
Thanks for the pattern! I liked how you twisted the wire for the nose area and combined the two types of mask designs. This has enough room to fit over an N95 mask which is what I was looking for to prolong its use while I am at work. Thank you!
LikeLiked by 1 person
Becky- you could always make it a smidge bigger if it ends up tight over the mask! Let me know how it works.
Rebecca
LikeLike
Yay! OMG. I cannot thank you enough for this! I am no architect, or pattern maker, and my sewing skills are rusty (but getting better all the time). I needed a mask that had these adjustments, and I found you. And cookies too! I’m forever in your debt.
LikeLike
Yay!! Yes, regular mask wearing requires something that will stay on your nose but be comfortable!! It’s a challenge!
LikeLike
Yay! This is exactly what I needed. Thank you so much. I am no architect, nor am I a pattern maker, heck my sewing skills were pretty rusty until a few months ago. This has made all the difference. And cookies too! Thank you.
LikeLike
Is there a way to do your Mask 2.0 with elastic loops instead of bias tape ties? I like the idea of a curved nose and nose wire on a pleated mask, so I’d like to try your pattern. I have plenty of elastic now, but no bias tape to be found. Also, is there a way to make the wire removable? I’ve just had 4 inch “pocket” on my other pleated masks, but I’m not sure how I could do that with a curved nose.
LikeLike
I think that’s a very different mask you’re describing. For ear elastic I’d probably add 1″ to the width and after I folded the pleats and sewn them in place, I’d sew a straight line about 1/2″ from the ends and fold over on that line and stitch in place to make either a finished edge or a channel to feed elastic through or sew it at the corners. I’ve seen a pleated mask where the inside fabric was two pieces with an overlapping set of finished edges, so that you could take a filter in and out. I can’t breathe through an additional layer myself so I didn’t add a pocket. Wire has been in all our masks and they’ve been washed a bunch and are fine. If you have a pocket you could leave an opening in the topstitching to stick a wire in and out. You might check out the first mask pattern I referenced- it’s not pleated but it has those other features and works great too. I have two I wear a lot!
LikeLike
Thanks for this tutorial! I have made many regular pleated masks and wanted something to curve better to my nose and eyes, but the cupped masks seemed like too tight of a squeeze. This seems like just what I was wanting to make and I can’t wait to try it!
LikeLike